We may earn money or products from the companies mentioned in this post.
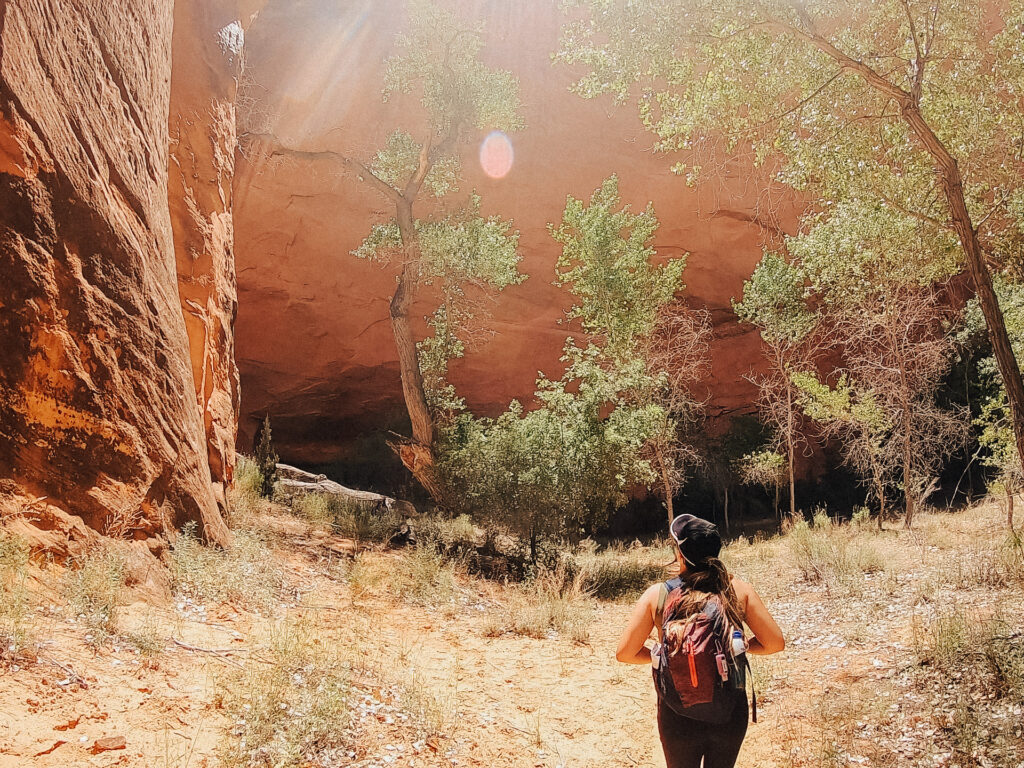
Coyote Gulch is filled with towering arches, waterfalls, natural springs, petroglyphs, and hidden wonders. Coyote Gulch is a moderately difficult hike, more-so because of the length and the scaling of a mountain to enter into the gulch. This hike is most often backpacked over multiple days, but can also be done in a long day hike – as we did here.
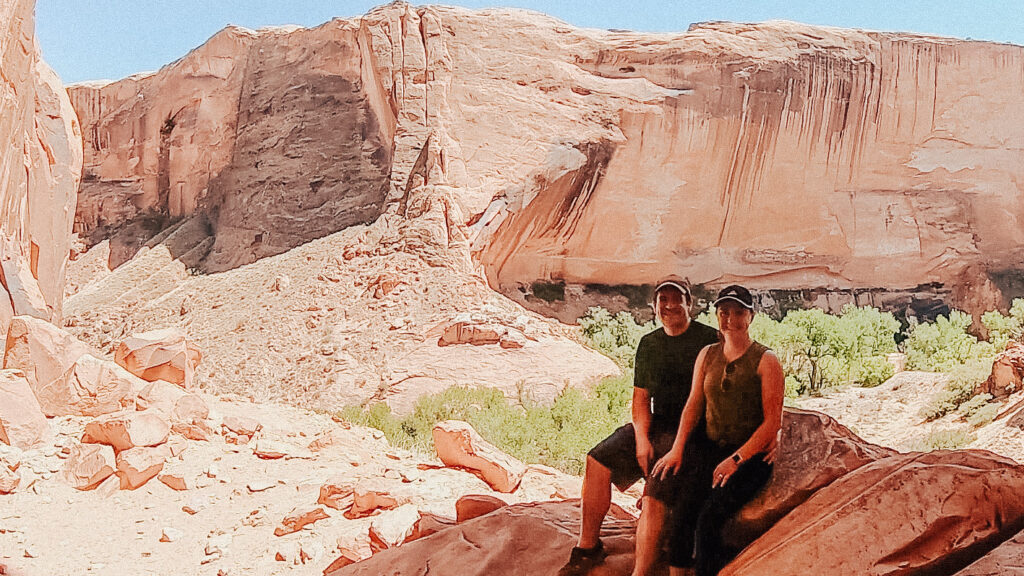
Matt and I hiked Coyote Gulch with my cousin, Brea, and her boyfriend, Tyler. For us, this hike was miles 10.7 miles long and took us 8 1/2 hours to complete the hike. We started at 10:40am and finished at 7:10pm, but we will try and get an earlier start next time.
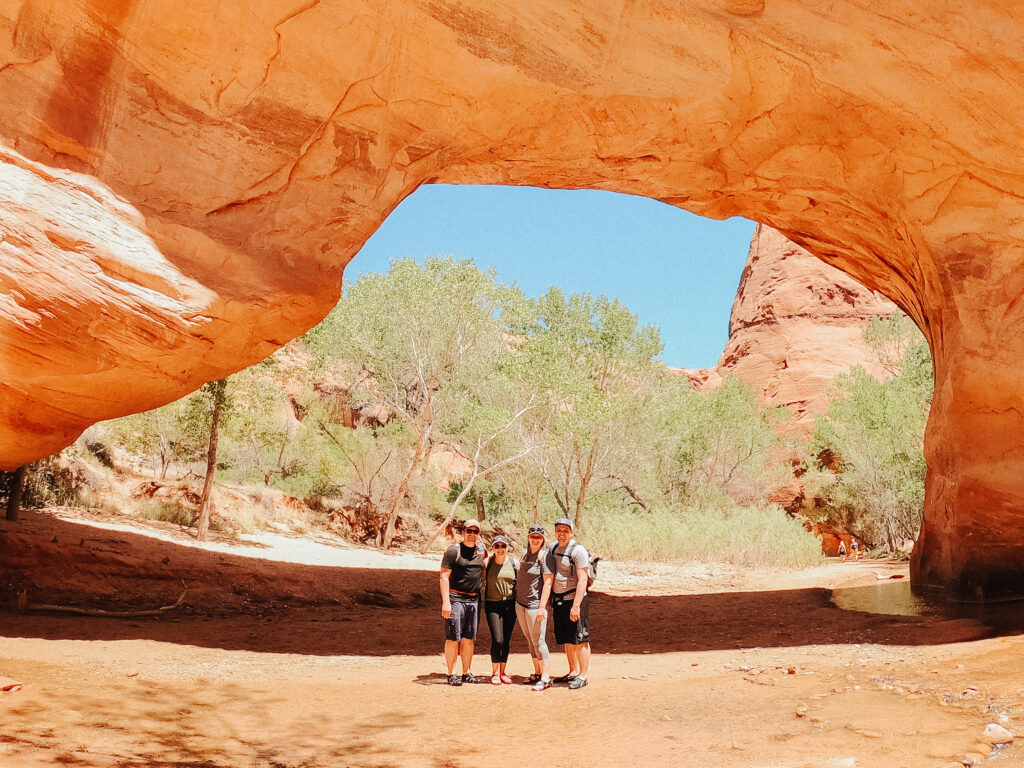
All four of us absolutely loved this hike. Coyote Gulch is most often backpacked, but we decided we wanted to try and hike it within a day. Most people backpack in because the hike is so long, and there is so much more to explore within the gulch. We missed out on a few cool sights just because we didn’t have time to see them all.
Coyote Gulch
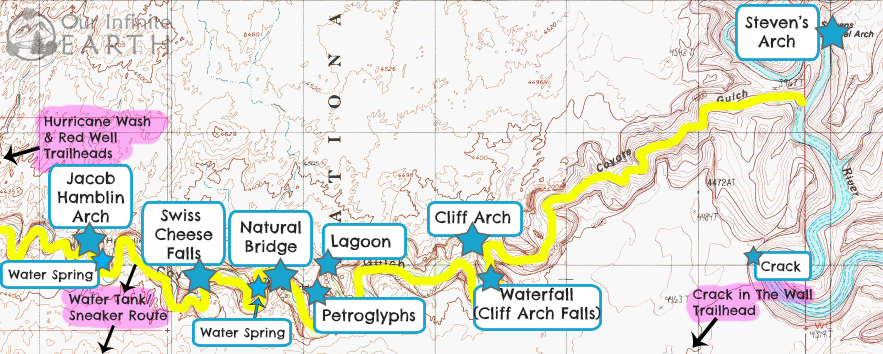
Once you get into the gulch, the sites are amazing and there is so much to see. I recommend downloading the app Maps.me and downloading the Southern Utah map so that you can access it even without service. Then you can locate each of the attractions and bookmark them to your app so that you don’t miss any. Most of them are hard to miss since they are right on the trail, but there are a few others that are very easy to miss, and a few hidden gems that most people don’t even know about that are easier to find with the help of the map.
Attractions:
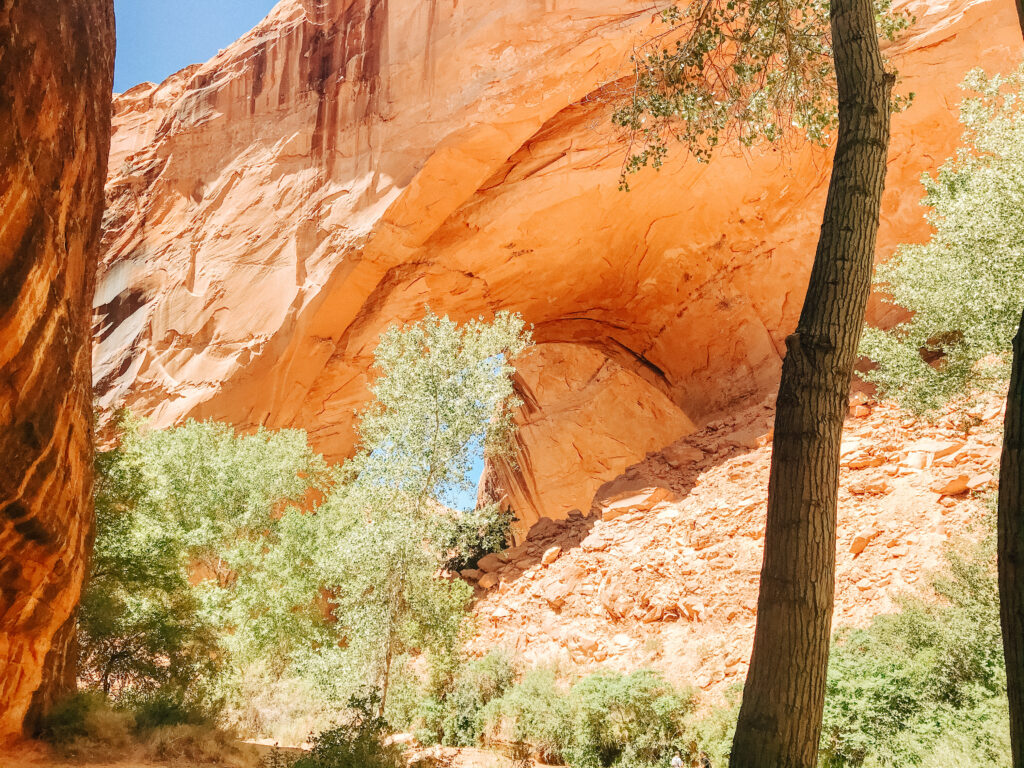
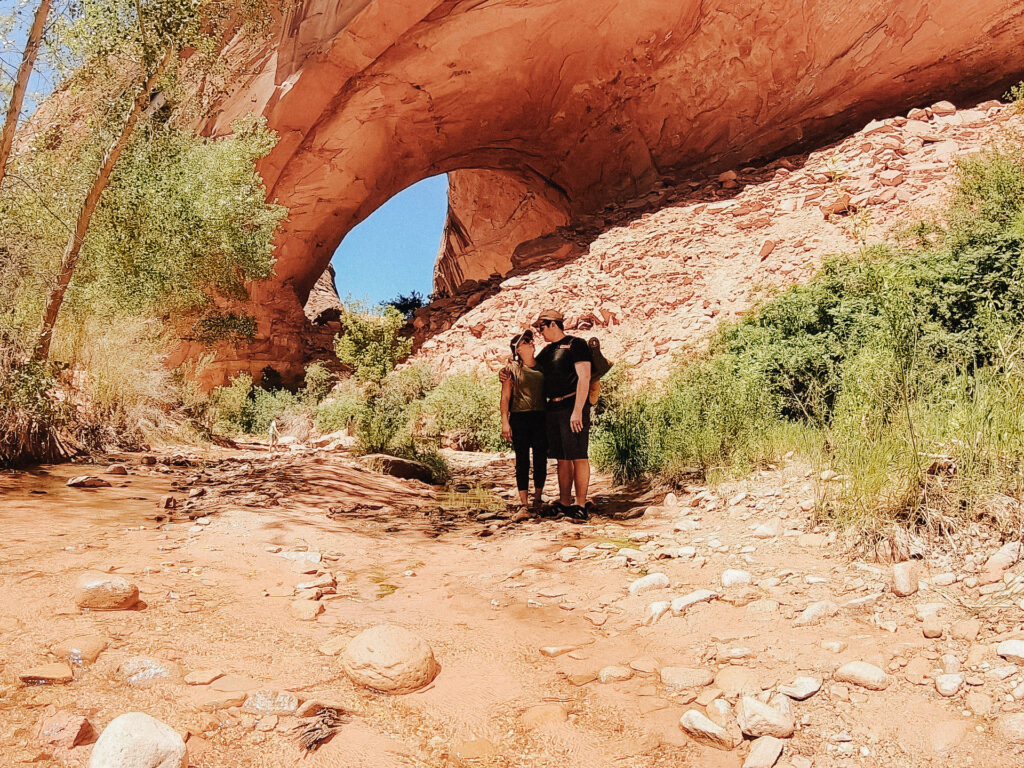
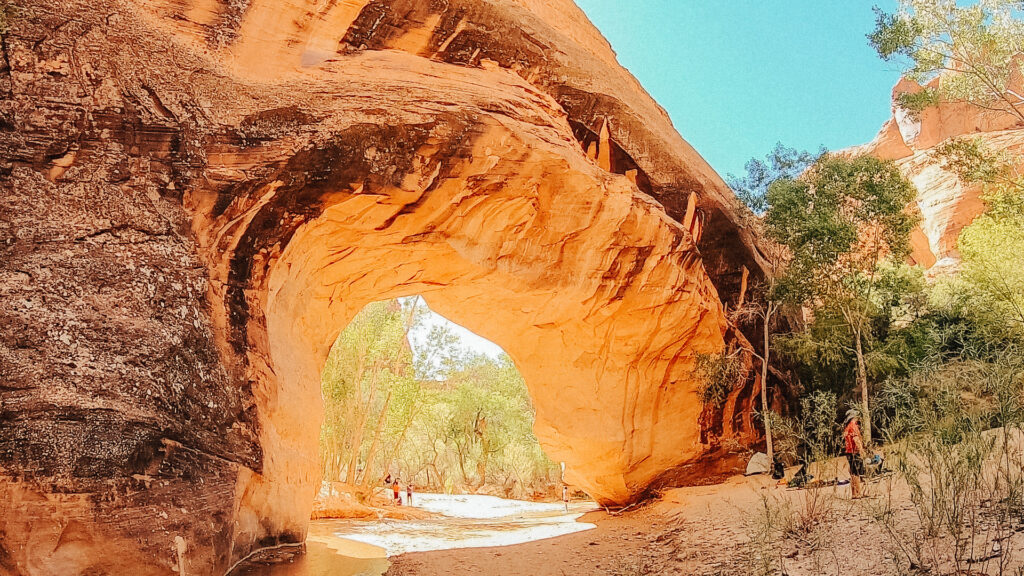
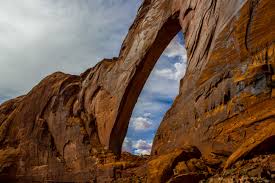
Jacob Hamblin Arch
GPS coordinates: 37°25’08.05″N 111°02’35.14″W
This arch is stunning and is great to view from both sides. This is the first attraction you will come to if you are coming from Hurricane Wash or the Sneaker Route. When we entered the gulch via the sneaker route, this arch was directly to our left. We looked at it and took some cool pictures from this side, but for some reason, we didn’t even think to head over to the other side of the arch. I highly recommend hiking over to the other side, as this is one of the most photographic places in all of Coyote Gulch. I am bummed that we missed this view of the arch, but we will be sure to see it next time.
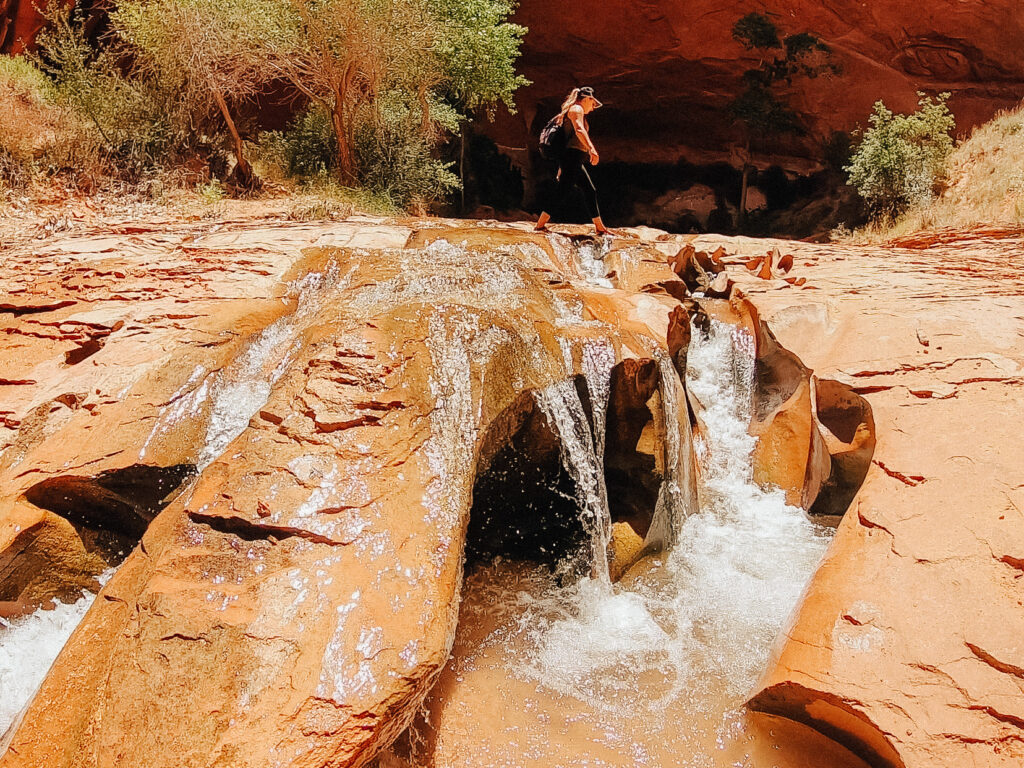
Swiss Cheese Falls
GPS coordinates: 37°24’55.62″N 111°02’00.44″W
This little waterfall is pretty amazing, although it is small. It is 1.2 miles from Jacob Hamblin Arch. Swiss Cheese Falls is an easy one to miss because the trail comes from behind the falls to where you can’t see the front and it won’t look like much. Be sure to add this one to your map and head off the trail a bit so that you can see it from the other side. It is also a great place to play around in the water and cool off.
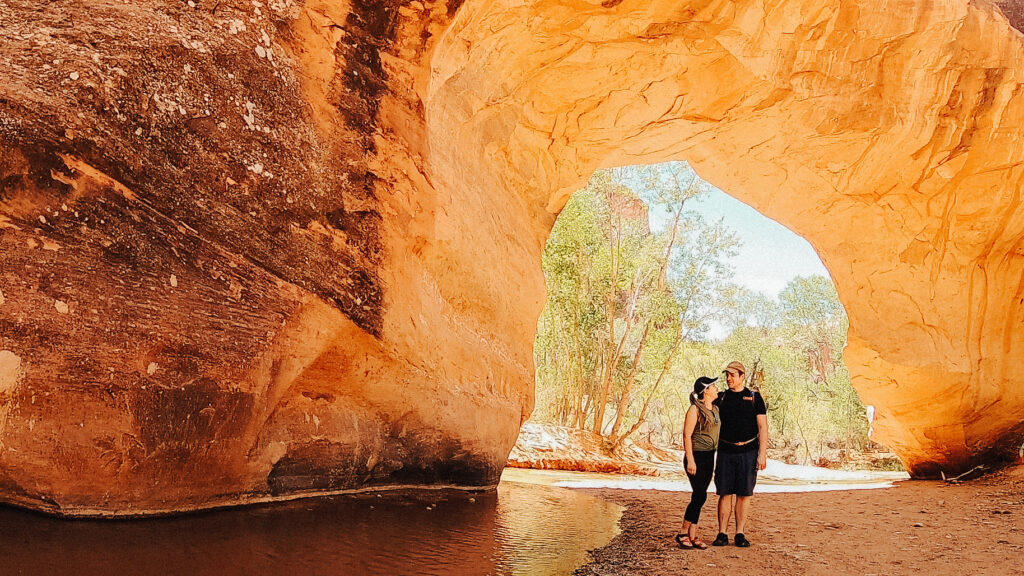
Coyote Natural Bridge
GPS coordinates: 37°24’58.99″N 111°01’39.93″W
Coyote Natural Bridge is .5 miles from Swiss Cheese Falls and 1.7 miles from Jacob Hamblin Arch. This natural bridge is beautiful and is another good arch to view from both sides. There is usually great shade here and it is a great place to stop for lunch, which was the case for us.

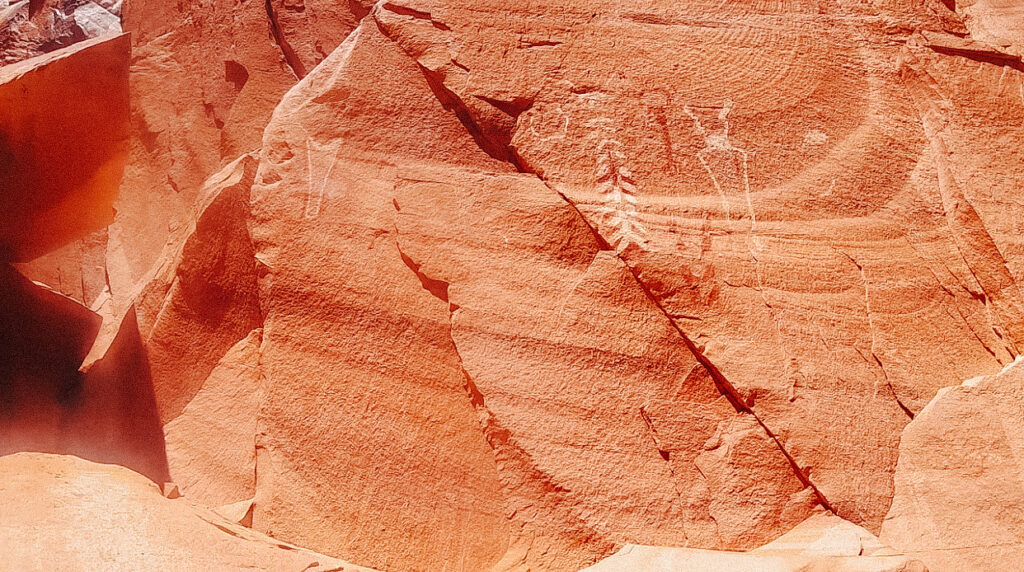
Petroglyphs
GPS coordinates: 37°24’56.16″N 111°01’17.4″W
These petroglyphs are located 1 mile from Natural Bridge and 2.7 miles from Jacob Hamblin Arch. You will most likely not see these petroglyphs if you don’t add them to your map. To see them, you will have to take a fairly strenuous route up the mountain. Don’t worry, this path is short and should only take you a few minutes, but will definitely make you huff and puff a bit.
To find the trail up to the ‘glyphs, you’ll need to stay to the left of the river during this section of the gulch. You’ll see a hill without shade with a small path that leads up the mountain. As you near the top, you’ll see the ‘glyphs to your right on the wall of the mountain. They were much bigger than any other petroglyphs I had ever seen and were very cool to view from up close.
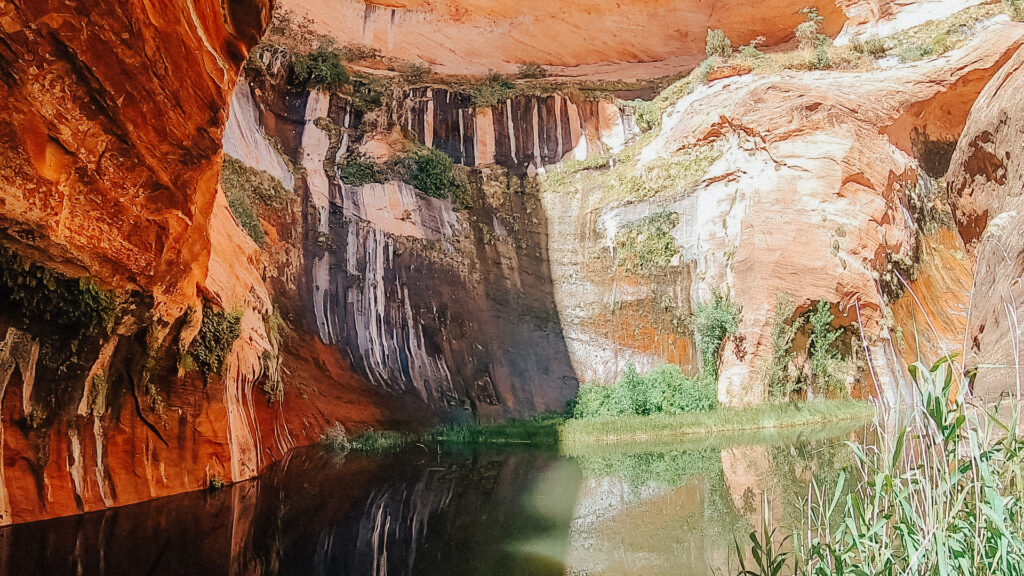
Secret Lagoon
GPS coordinates: 37°25’01.92″N 111°01’16.68″W
Secret Lagoon is only .2 miles away from the petroglyphs or 2.9 miles from Jacob Hamblin Arch. To find the trailhead, stay on the left of the river and close to the canyon walls. You’ll see a larger campsite surrounded by trees. To the left of the site, hugging the canyon walls, you’ll see a small trail that leads into the trees and reeds. Follow this trail all the way back to the Secret Lagoon.
This was a fun part of the hike for us, as it felt like we were in a rainforest because of how dense the foliage is and that this path isn’t as popular as the main trail. We had to cross a small stream a few times by walking across some fallen trees. I did think there was some poison ivy at a few points, but we hadn’t read anything about it and none of us got any rashes, so we are pretty sure it is safe…?
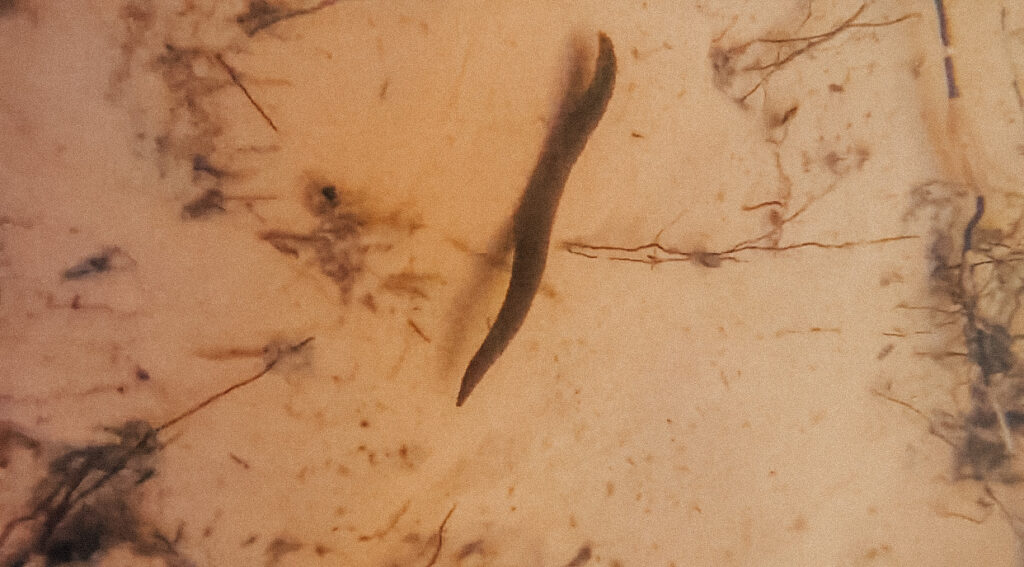
We wanted to swim in the lagoon, but we saw leeches and some large pincher bugs (a.k.a. toe biters) swimming in the water right near the shore and thought it was best not to get in. However, I do know that some people do still swim in it.
Secret Lagoon was the terminus point for us. Initially, we had wanted to go as far as Cliff Arch, but we started a little later in the day than we had anticipated and we wanted to get back before dark so we left after seeing Secret Lagoon.
Cliff Arch Falls
GPS coordinates: 37°25’03″N 111°00’27.72″W
Cliff Archs Falls is 1.2 miles from the petroglyphs, 2 miles from Natural Bridge, and 3.7 miles from Jacob Hamblin Arch. This waterfall is beautiful and a fun place to take pictures at or take a little rest. I’ve read that to get a good look at the falls, there’s a path to the left of the falls through the “woods” that allows you to get down below.

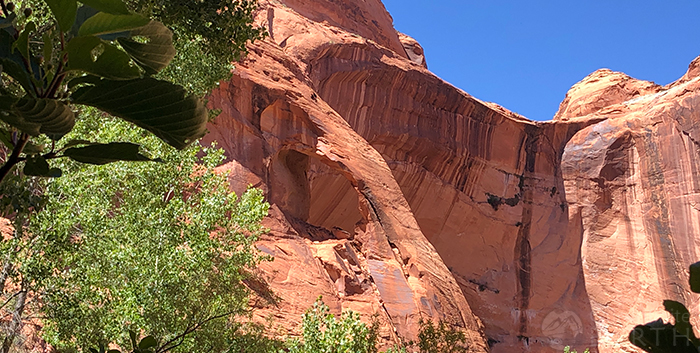
Cliff Arch
GPS coordinates: 37°25’11.37″N 111°00’26.87″W
Cliff Arch is .2 miles from the falls and 3.9 miles from Jacob Hamblin Arch. Cliff Arch isn’t an arch that you walk underneath. This arch is set upon the side of the mountain and is shaped like the handle of a milk jug. It is easy to miss since you have to look up to see it. Cliff Arch is one that you’ll want to make sure you have bookmarked in your map so you don’t miss it.
Steven’s Arch
37°26’00.44″N 111°58’45.99″W
Stevens Arch is 3 miles from Cliff Arch and 6.9 miles from Jacob Hamblin Arch. Steven’s Arch is a bit further away and there’s not much to see in between Cliff Arch and Steven’s Arch, but Steven’s Arch itself might be worth it. It is the fourth largest arch in the world and one of the largest arches in the country, at 160 feet tall and spanning 225 feet.
I’ve read that from the trail it is a ways off in the distance, but that if you are feeling up to it, you can figure out how to climb closer to it and get a better view. I’m sure this would add quite a bit of time to your trip since there isn’t an official trail to get to the arch.
Steven’s Arch will be the first attraction you’ll see coming from Crack in the Wall, and the last if you are coming from Hurricane Wash or the Sneaker Route. I added this arch to my map just so I could see how much further town the trail it was (too far for this trip).
Accessing the gulch:
There are four different ways to enter the gulch.
- Sneaker Route or Water Tank Route: this is the best route for a day hike (shortest route)
- Crack in the Wall (second shortest route)
- Hurricane Wash (second longest route)
- Red Well (longest route, least used route)
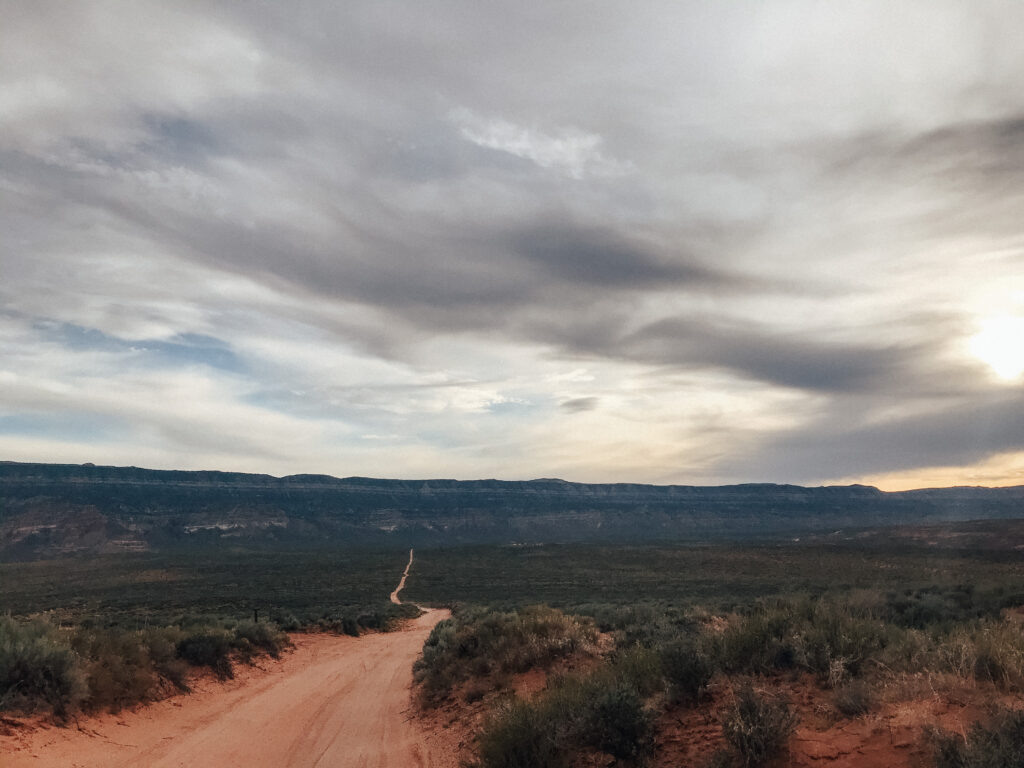
*Note: All routes are accessed by driving down Hole in the Rock Road, which is a long, rough, washboarded, dirt road. It is passable by sedan, but if you are going to go on any of the off-roads, it is usually best to have 4WD and high clearance.
Lets go over each route so that you can choose the best one for you:
P.S. Here is a map that shows all the routes and Coyote Gulch
Sneaker Route/Water Tank Route:
GPS Coordinates for trailhead: 37°23’32″N 111°02’54.96″W
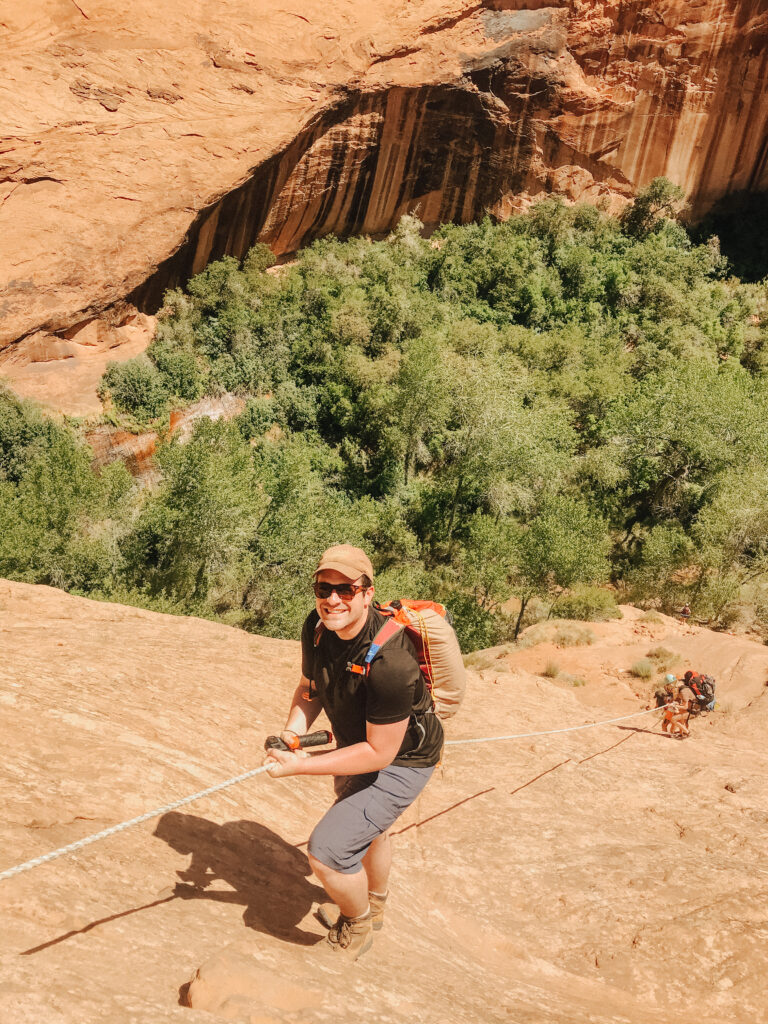
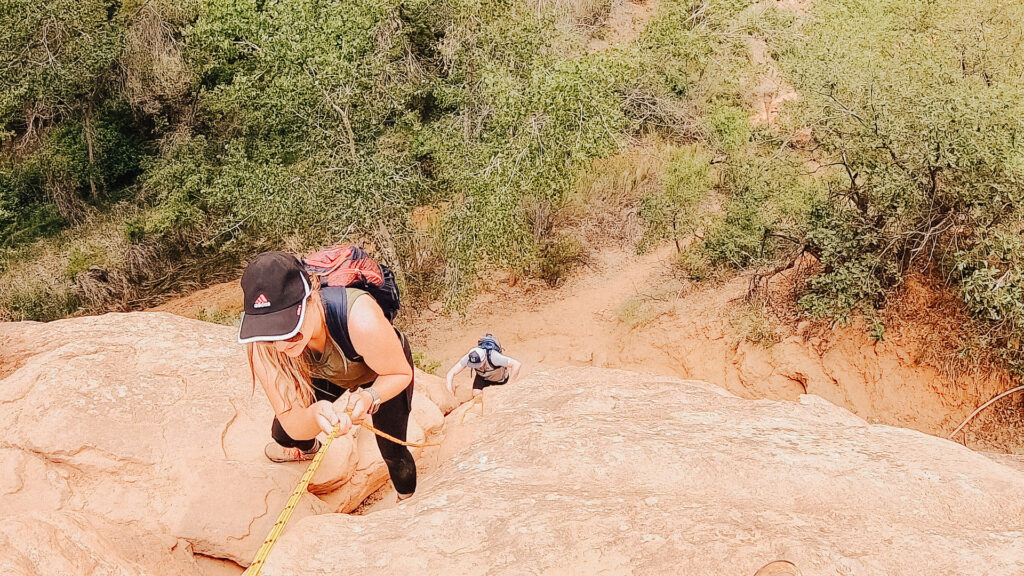
This route is 2 miles from the parking lot to the gulch. You enter the gulch right at the first attraction, Jacob Hamblin Arch. This is the best route for day trips because it is the fastest and most direct, and it lands you right at the start of the attractions. This is also one of the hardest routes due to the fact that to enter the gulch, you have to climb about 100 feet down the mountain at roughly a 75 degree angle. We recommend taking a climbing rope to help aid in getting down/back up the mountain.
I personally thought the rope/mountain climb would be especially hard with a large backpacking pack on, but we did see others successfully do it, so it can definitely be done. Just in keep mind that it will be pretty challenging. One girl in front of Matt had a pretty major panic attack going down the rope, so if you are prone to these or afraid of heights, maybe choose a different entry point.
To get to the trailhead, head East on Forty Mile Ridge Road, also known as BLM 270, which is located 36 miles down Hole in the Rock Road. You’ll stay on Forty Mile Ridge Road for 4.3 miles until you see a parking lot to your left up a small hill. Most likely, you will see a lot of cars parked here already, since this is a pretty popular hike. To the north of the parking lot, you will see that the trailhead begins next to a water tank and the trail box. Sign in at the box and if you are camping overnight, this is where you will get your free permit.
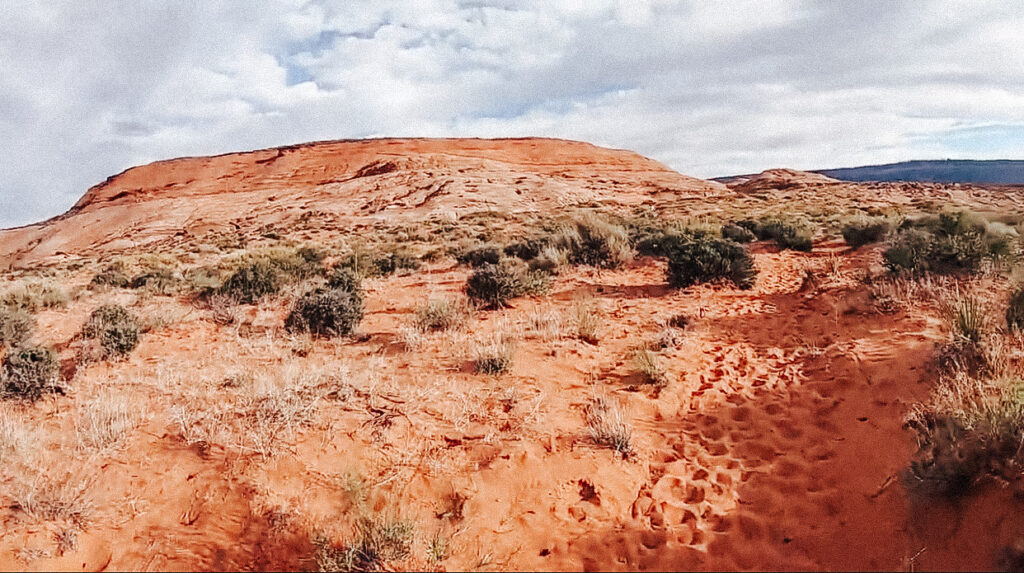
Head north and follow the sandy trail until the sand gives way to rocks, then follow the trail along the rock cairns. As you near the end of the trail, you’ll start to see the opening of the gulch and you’ll soon get to the spot where you will have to climb the rest of the way down the mountain.
When we went, there was a rope already tied around a large rock to help assist us as we descended. But you shouldn’t always count on a rope being there. If you can, bring a 100+ foot rope to help you descend into the gulch. If you don’t have a rope, this climb is possible, but it will be difficult. This descent is not for the faint of heart.
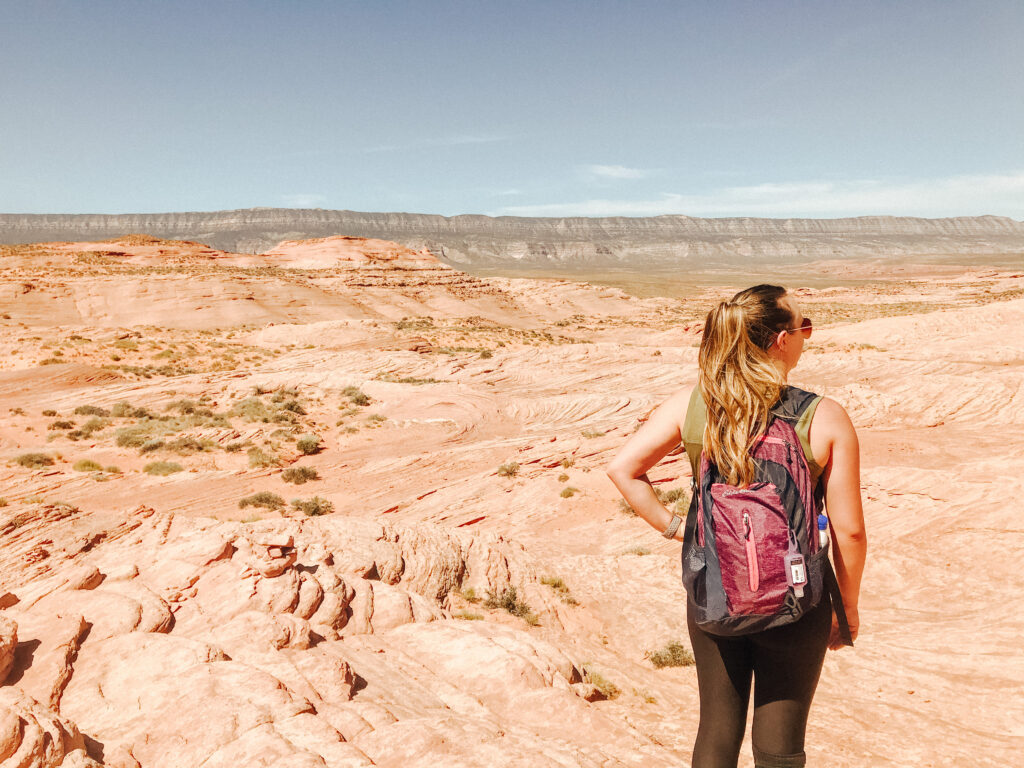
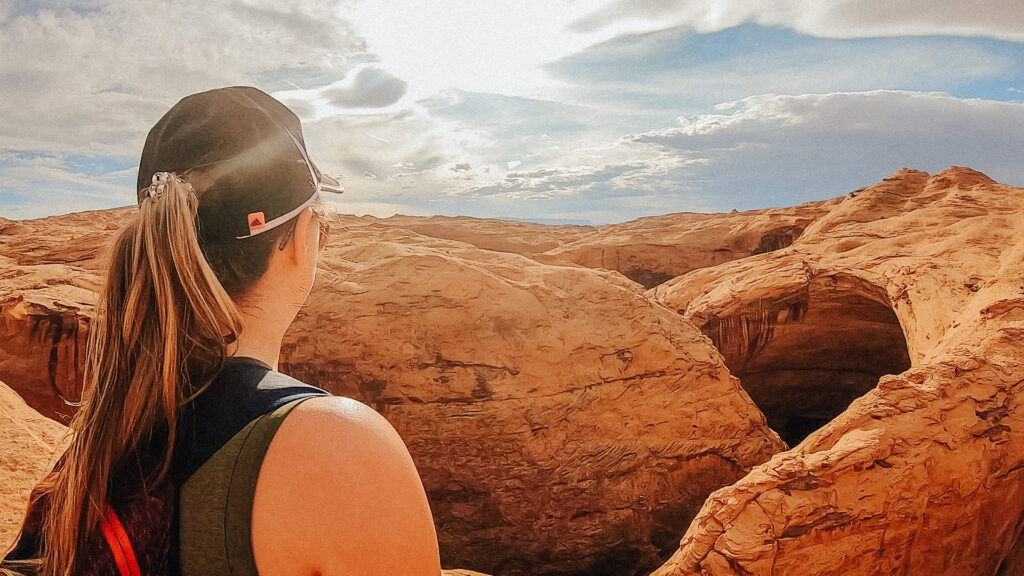
Once you descend and finally enter the gulch, you feel as if you’ve accomplished something amazing, and then you will have amazing views to reward you the rest of the way.

Crack in the Wall Route:
This route is 2.5 miles to the gulch from crack in the wall. This is the second shortest route to enter the gulch and is also a more popular route. To get here, you will take the same road as the Sneaker Route, which is Forty Mile Ridge Road, or BLM 270. You will follow this road for 6.8 miles and will pass the Sneaker Route, then stay to the left at the next junction and continue heading east. Towards the end, you’ll pass over another cattle guard and the last 2 miles of this road are through deep sand. It is recommended to have a 4WD/high clearance vehicle for the last stretch of this road.
You’ll see the trailhead at the north side of the parking lot. Follow the cairns northeast for about 2 miles until you reach the rim of the canyon. Continue for another half mile and be on the lookout for the 24″ wide “crack in the wall” in which you will climb down into the gulch. Many backpackers will lower their packs down into the canyon by rope before descending the crack, as it is not wide enough to carry it on your back as you go through. If you have a day pack, you will probably need to take it off and carry it in front of you.
This route is still moderately difficult, especially in high heat. It is best to start early in the day, or hike in spring or fall when the temperatures are cooler. You will enter the gulch at the opposite end of the attractions and the first one you’ll see (at a distance) is Steven’s Arch, the fourth largest arch in the world!
Many people who enter at Crack in the Wall tend you exit via the Sneaker Route.
Hurricane Wash Route:
This route is 6 miles from the trailhead to the Escalante River and is also the easiest/least strenuous route to enter the gulch. To get to the trailhead parking lot, take Hole in the Rock road 33 miles until you reach a parking lot on the righthand side of the road. Park here, and the trailhead starts just on the other side of the road.
Hike east in the dry wash and you’ll be heading towards Coyote Gulch. A quarter mile in, you’ll find the hiker’s registration for overnight permits. Continue on the trail for about 6 miles until you reach the junction with Coyote Gulch.
Matt and I have decided that if we choose to backpack the gulch in the future, we will access it either by Hurricane Wash or Crack in the Wall, as they will be easier than climbing down the Sneaker Route.
Red Well Route:
This route is 13 miles form the trailhead, and is also the longest route to enter the gulch. This route is the least popular route because of it’s length.
For this route, drive 30 miles down Hole in the Rock road until you see a sign on your left for Red Well, or BLM 254. From here, it is 1.5 miles to the trailhead. This road is not graded and can have deep ruts and pot holes, so make sure you have a high clearance vehicle if you take this route.
You’ll follow the path downstream towards the east. On this route, there isn’t a whole lot to see before you get to the gulch, but for some, they might like that this route is the least busy and they will get the whole place to themselves.
What to wear and what to bring:
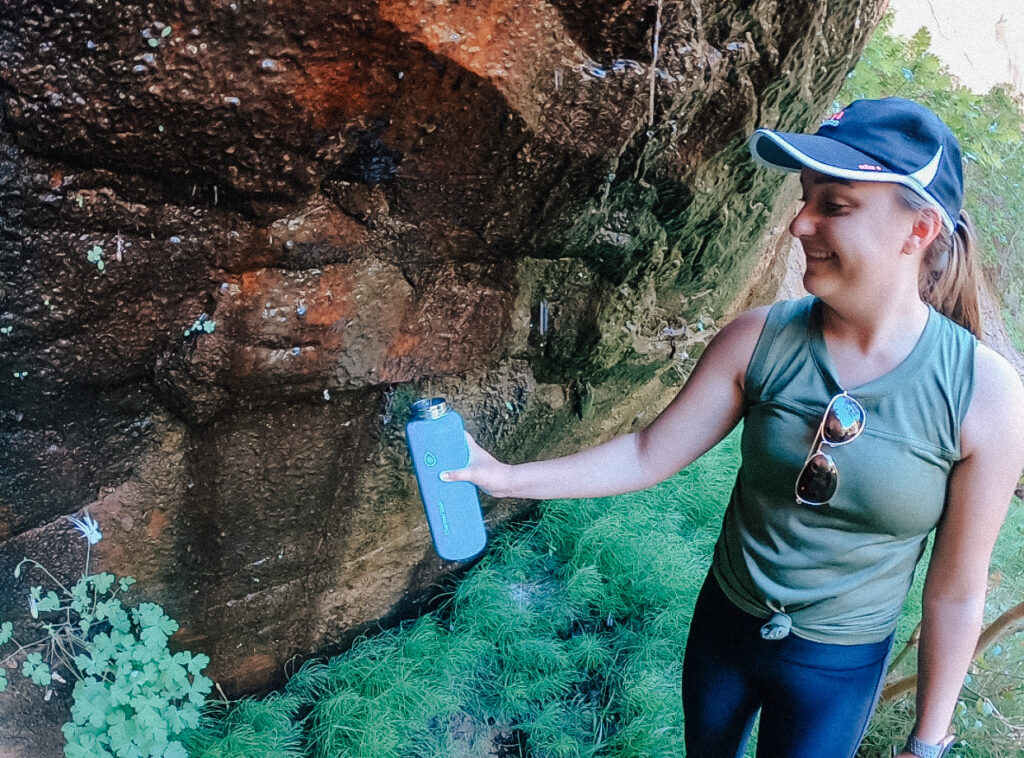
- For this hike, you will want plenty of water. If you are backpacking in, you’ll want to bring water treatment tablets so that you can treat the water from the river. If you are going as a day hike, there are a few fresh water springs along the trail that you can fill up on, although they are more of a trickle so they take some time.

- You will want to bring water shoes or shoes that can get wet. For this, there are multiple options:
- You can wear hiking sandals such as Chacos (mine and Brea’s preference)
- You can wear water sandals like these that have good traction (Matt’s preference)
- You can wear water shoes/slippers like these that cover the entire foot and have good traction (Tyler’s choice)
- You can wear water sneakers like these
- We saw people bring two pairs of hiking shoes – one to keep dry and one to get wet (this will require some good socks so that you don’t get blisters with the wet shoes)
- Suncreen! The hike getting into the gulch is hot and there is no shade out here. You can burn so easily, so remember to wear sunscreen, reapply often, bring sunglasses, and a hat.
- If you are hiking via the Sneaker Route, you will want a 100+ rope to help guide you up or down the steep mountain
Overall, the four of us loved this hike and think it would be fun to backpack in and spend more time here in the future. That being said, we all thought this hike was great as a day hike as well, although it was on the longer side, and with it being a longer hike, it didn’t leave much time for us to rest and explore inside the gulch much.
Whatever your preference, backpacking trip or day hike, this hike is one to add to the list for sure! Feel free pin a photo below so you can come back and reference this hike.
No Comments